Your Cart

Xiegu G90 HF Radio | SDR | QRP | Auto Antenna Tuner | 20W | Remote Head

Write a review
SKU: 28-715-004
  • $445.00
  • Regular price $499.99 SAVE $54.99


Only 802 left in stock

Current Stock Status
United States
Europe


◆ Detachable Display Unit —— The display unit and the radio body can be separated. This allows you to place the head remotely. What's more, the radio is very compact.

◆ Wide Range Auto Antenna Tuner —— Unlike other QRP radios, the G90 has a wide-range internal automatic antenna tuner so you can load up your favorite field antenna!

◆ Beautiful Color LCD Screen —— All vital operating information is clearly visible in daylight conditions. 48KHZ wide spectrum display with waterfall gives you excellent awareness of the signal conditions around you.

◆ Easy to Use —— Intelligently designed, the most commonly used functions are on hardware buttons. Next you can use the Quick Menu function to access often-used functions.

◆ Firmware Updates——We do provide firmware updates to enhance the functions of the radio – at no cost. You can easily update the firmware yourself.

◆ Warranty Note —— We provide a 18-month warranty on the Xiegu G90 (was 12 months before September 14, 2022). As usual, if you modify the radio's hardware, the warranty is void. (The warranty is void right after you remove any part of the radio case without the agreement of our support team.) Note any firmware bugs or any other software-related issues are not under warranty.

Disclaimer: No License is required to purchase this radio, nor to Monitor (listen) to the many Amateur (Ham) Radio frequencies. However, an FCC License is required to Transmit (Talk) on Amateur Radio Frequencies in the USA. Please visit http://wireless.fcc.gov/services/amateur/licensing to learn more.

Note: 
1. G90 Latest Firmware: V1.80 | CLICK TO DOWNLOAD
2. 2023 Firmware Update Instruction | CLICK TO LEARN
3. Radioddity Customers G90 FAQ | CLICK TO LEARN
4. Xiegu G90 CAT and Digital Mode V1.0 | CLICK TO LEARN

CLICK HERE to download the detailed user manual V4.2.3 provided by Radioddity.


RELATED BLOG
How to Update Xiegu G90 Firmware? | 2024 Latest Guidance
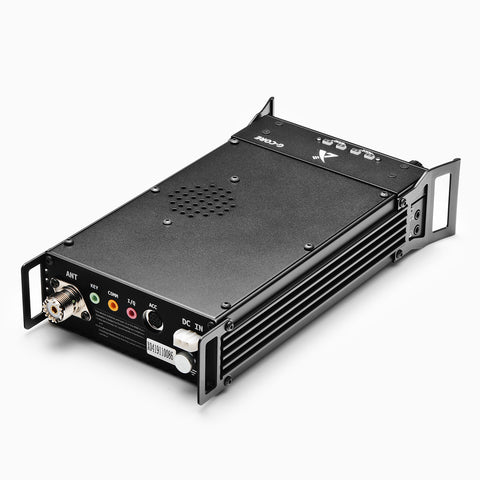
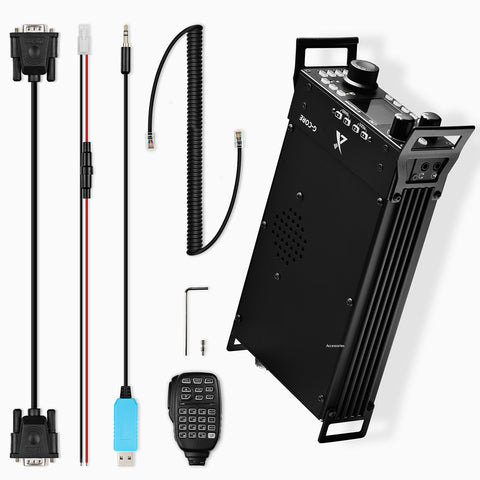
This is the latest Xiegu G90 firmware update guidance for you all. With every new firmware releasing, more and more new features are available. The following items are needed: A. USB-to-Serial cable B. G90 C. A computer running the Windows (XP/Vista/7/8/10/11) operating system D. A 12-15V DC power supply (capable of supplying not less than 5A)   1. Install USB-to-Serial cable: The very first thing is to make sure that the USB-to-Serial cable is working properly with the personal computer. The first time the cable is plugged into a USB port on the computer, the operating system will search for a driver file for this new hardware and automatically install the driver program. If all has gone well, we will be able to see the virtual serial port in the device manager program. If the driver file can’t be automatically installed by the operating system we will need to install it manually (driver files are available from the Radioddity G90 support page). (Note: very early Xiegu USB-to-Serial cables used the Prolific Chip, currently supplied cables use a chip from FTDI, the old cables tended to be black in colour, the newer ones blue.) After this action the virtual serial port and its port number will be visible in Windows Device Manager (which on the below computer you will see is COM6).   2. Wiring everything up: 2.1 Connect power cable 2.2 For updating the firmware in the head unit: 2.3 For updating the firmware in the base unit: 3. Update firmware via TeraTerm terminal software (The program is supplied in firmware zip file from Radioddity if you don't already have it installed): In order to transfer the firmware to the device, we use a serial terminal software program with XModem support called TeraTerm (other programs can also be used but this guide is for TeraTerm). 3.1 Install the TeraTerm terminal software However, we are finding that some of the more aggressive Web Protection/Virus/Malware applications may be stripping the update and firmware files from the downloaded archive, or when the archive is extracted. The following link will allow you to download a certified virus-free Tera Term application used for the G90 update process. RE: teraterm-4.105 https://tera-term.en.lo4d.com/windows On any executable application, Right-Clicking on the app will open a selection box in which Run as Administrator is an option. Selecting Run as Administrator will ask for your permission to let the app make changes to your computer - Click YES You will next see this: Click on the I accept the agreement option and click Next You will be given the option to accept the default installation location or Browse for a new one: Click Next Accept the defaults and click Next Select Language and click Next Select default or Browse for Start Menu Folder and click Next Select additional tasks/options and click Next Confirm installation options and click Install Select Launch Tera Term and click Finish 3.2 Confirm your COM Port Open Device Manager, Click on Ports (COM & LPT) Observe Port number -- Right-click on the USB Serial Port (COMx) --x is the Com Port Number. Select Properties, then Port Settings. Confirm Bits per seconds is 115200. Click OK   3.3 Configuration of TeraTerm a) Select the serial port: From the upper bar, select File/New Connection and then when the panel opens, the serial radio button. This is where we enter the com port (COM5 in the below case, yours could be different) which we saw in Device manager earlier – select it from the list of available ports from the drop-down list.       b) Now we set the communications baud rate: Select Setup/Serial port. Confirm the Speed is 115200 Click New Setting c) We are now presented with the main terminal window:     d) Now ith G90 connected to a 13.8 Volt DC Power source capable of at least 6 amps current capacity, we start the G90 and want to enter the maintenance menu: If updating from an early version of firmware to the current version press the space bar within the first 10 seconds of the start-up. If a normal boot occurs try again with the space bar on the computer held down and with the terminal program “having focus” i.e. selected. If updating from a recent version of firmware press the volume button on the radio as you turn the radio on. Again, if this fails, try the process holding the space bar down and powering the G90 on. Both of these actions interrupt the normal booting procedure and present you with a menu as shown below. Why? HOLD SPACEBAR DOWN and press G90 Power Button (for G90 radios with Serial Numbers not containing the letter V as the prefix) Press Volume Knob and power-on the Display Unit (for G90 radios with Serial Numbers containing the letter V as the prefix (ONLY those containing a V as the first character of the Serial Number)   e) The firmware update menu will appear: (When updating the main unit, there is a count-down timeout during which time you need to press 1 – when updating the display unit, there is no timeout, it waits for you).   Step 1: Press 1. Update FW Step2: “Erasing.. 100%” and “Wait FW file...” will be displayed – the old firmware in the radio has now been erased and the menu is waiting for you to supply the new firmware code.     When the old firmware is erased and the message displayed is Wait FW File,   f) In Tera Term Click File → Transfer → XMODEM → Send In that order Select Main Unit firmware update file (download the latest firmware of Xiegu G90), click Open   Check the 1K Option Box The transfer will not work if you do not do this!   g) The transfer will start loading     h) Wait until the transfer finishes   Once the transfer has successfully completed the G90 will restart automatically. i) If you need to update both parts of the radio (head and main units) 
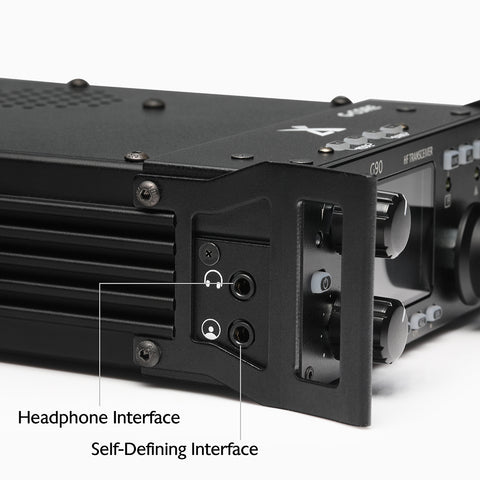
Remove power count to 5 and reconnect power Remove the plug from the rear and insert in the lower left-hand socket on the Display Head   If updating from an early version of firmware to the current version press the space bar within the first 10 seconds of the start-up. If a normal boot occurs try again with the space bar on the computer held down and with the terminal program “having focus” i.e. selected. If updating from a recent version of firmware press the volume button on the radio as you turn the radio on. Again, if this fails, try the process holding the space bar down and powering the G90 on. Both of these actions interrupt the normal booting procedure and present you with a menu as shown below.   Select 1 Update FW When the TeraTerm displays Wait FW File In this order, select File – Transfer – XMODEM – Send   Select Display Firmware file Place a Check mark in the 1K Box   Click Open Loading……   Loading……     IGNORE THE LOST COMM Message if it appears On Completion, remove power from the G90 and count to 5 Re-Connect power to the G90. turn radio on. j) After restarting the radio, hold Function button in for 2 seconds, check the firmware levels through option 10 in the system menu.     Done!
Radioddity - Xiegu G90 CAT and Digital Modes V1.0
As you know, we not only sell radios, but also provide support to our customers. Often Xiegu G90 customers asked us about CAT control and digital mode operation with their G90. This was reason enough for our engineers to put together a document that includes all those bits and pieces required to successfully CAT control your Xiegu G90 and become active in digital modes such as FT8. What can you learn from this document? 1. Explanation on vocabulary such as IO-port, CAT, CE-19 and OpenSource 2. How to connect your Xiegu G90 to your PC using the blue USB-cable 3. Easy CAT control using an OpenSource solution 4. required settings for PC and Xiegu G90 5. Xiegu G90 CI-V implementation 6. Details on some of the possible digital data modes 7. Software for CAT control and digital data modes   Download your personal copy at: CLICK HERE to download the "Radioddity - Xiegu G90, CAT and Digital modes V1.0"  
Adding Bluetooth Support to the Xiegu G90 HF Transceiver
-- from Blog of Amateur Radio enthusiast Ed Durrant A “proof of concept” action. First, it is important to define what we are doing here. Some modern radios have Bluetooth built-in so that they can be operated remotely. The G-90 does not. I want to add such control to the XIEGU G90 (this may also work with the X5105 model as well, but this has not been tested). I do not intend to open the radio case, rather I will add standard external modules that are available over eBay and other online retailer sites. There are two parts to this action. Audio via Bluetooth. The first stage is to get audio to and from the radio from some Bluetooth enabled headset or earpiece, as used with many Smartphones these days. I expected this should be the easy part of the solution while there are many standard solutions available for this that can be purchased for a few dollars/Euros/pounds. Unfortunately, this part of the solution caused me the greatest problems as the issue with the common units is that they operate as a transmitter or a receiver needing to be manually switched between the modes or even they only operate one mode at a time by a cable being inserted into one or other socket. This is not going to work with a Bluetooth Headset (note we need to use a Headset, not Headphones – a Headset is Headphones with a microphone). The Bluetooth electronics in Smartphones have this “duplex” capability but to find an external adapter with the same capabilities is not easy. Investigation showed that “aptX” support can supply what is required to handle audio going to and coming from the headset at the same time but even an adapter that says it has aptX (often one that also has NFC) isn’t always one that will handle two-way audio! The alternative using two BT adapters, one running as TX and the other as Rx path, will not work as the headset is designed for use with a smartphone and hence a single (duplex) channel. The audio connections (ought) to be the simpler part of this project – it seems not to be the case! I gave up looking at the direct adapter solution when I saw that an audio plus PTT solution is already available for HTs. These kits include adapter, earphone/headset and PTT button are not cheap, so shop around but make sure you are buying the complete kit and not just the earphone at the advertised price, which is not always clear!   The ideal would be just to buy the “HB-6A” adapter in the middle of the picture above and I did eventually find one company selling just that at $25 plus P&P after I had ordered a complete kit. Prices for the same kit can vary from €29 to €90! The headset alone costs €13.95. Shop around and the “kit price” from several AliExpress and eBay sellers is around €40 including tax and shipping. Of course, if you don’t already have a Bluetooth headset that you wish to use, then the one in the kit might be fine as it’s supplied to use with the adapter in a communications mode. I already had an over the ears BT headset, so now I have both Headset and earpiece/microphone. After wiring this set via 2.5mm and 3.5mm stereo jacks to the ACC socket mini-DIN plug, pairing the headset to the unit and testing, I found two problems. I had no audio coming out to by Bluetooth headset or earphone. This was simply solved by switching the output from the Internal speaker in the G90 to the ACC socket in the system menu. This is reached by pressing the <FUNC> button once so that the orange light comes on and then the <POW> button on the right-hand side of the radio, twice and then using the main tuning knob to change the setting from SPKR to LINE. You can also access the levels of the line input and output in these menus and I suggest you set both of these to their top value of 15. Then the microphone level was far too low. As I have wired to the ACC socket – it expects computer level (1v peak-to-peak) audio, whereas the HT, where this BT adapter would normally connect to, would be expecting electret microphone level audio. Now I could wire up an inline RJ45 connector and feed the audio into the microphone socket of the G90 but I decided rather than doing that I would add a small €3 LM386 amplifier module that is normally used with Arduino projects. This has the advantage of having a volume control, so I can set the audio input level correctly. The first test of this modified set-up was fine up to about 3 watts but after then there was constant output indicated even when I wasn’t talking – RF Ingress! So I added a parallel pair of a 0.1 (104) and 0.01 (103) µF ceramic capacitors across the input and output of this pre-amp module and a 0.1 (104) µF capacitor directly on the mic connector on the 3.5mm jack socket, to the ground (earth) connection on the 2.5mm jack socket and with my next test… No RF Ingress – all levels were quiet until I spoke then the output meter indicated full scale on 20 watts. I suspect I will need to back the gain off a little now H.I. A total surprise was that after pairing the little PTT button that also came with the audio adapter set, it worked straight away with no issues at all, meaning I can use this rather than the PTT option in the remote-control app (more about that app below). To avoid always having to unplug the module to charge its internal battery via a micro-USB cable, I added a regulator board designed for the Raspberry Pi to take the 8 or 9v coming from the G90 ACC socket down to 5v for the mini-USB socket so that the Bluetooth audio module is constantly being trickle charged while in use. This supply also has a spare micro-USB plug to charge the PTT button unit when needed. CAT Control via BT. The second part of the solution is to get CAT (Computer Aided Transceiver) remote control commands over a Bluetooth serial connection to the radio from the remote device. Only by having a separate “remote control console” with the Bluetooth headset can the G90 radio be operated fully “cordless”. The remote device and software to do the control work is not discussed in this article. You may have your own choices but my choice is to use an Android Smart Phone and the PocketRxTx software ($5/5 Euro/5 pound for the full version – https://play.google.com/store/apps/details?id=ro.yo3ggx.rxtxpro ). The software handles the CAT side of this project. In addition, the phone itself could also handle the BT Audio but I prefer to use a BT headset. Background – ICOM has used a 3.5mm jack for their CiV CAT connections on their rigs for some time. Xiegu on models other than the X108G (which uses a micro-USB port) has also adopted the 3.5mm stereo jack along with a subset of the ICOM CiV command set for remote control of the radio. There is one important difference, however – the ICOM radios although fitted with a stereo jack, have Tx and Rx on the tip of the plug shorted together and don’t need a connection to the ring. The case is earth. Xiegu keeps Tx and Rx signals separate and uses therefore all three connections. There are already BT comms adapters that plug into the ICOM rigs on the market and cost around 15 Euros from China. Figure 1 Here is one example of the BT adapter for ICOM radios available over eBay. These dongles however are wired for the ICOM configuration of running TxD and RxD on a common line and are pre-set to 9600 Baud (whereas the G90 needs separate TxD and RxD lines at 19200 Baud) The DIN plug (which supplies 8v DC will not fit the G90). So, we will need to make some changes. As this CAT command BT module will need to take its external power supply from the 9v DC supply from the G90 ACC Mini-DIN port. IC-718 / 7000 accessory socket – standard 8 Pin DIN – this is what the dongle comes wired for. The XIEGU G-90 accessory socket is an 8 pin MINI-DIN This ACC socket has DC supply, PTT switching, audio in and out all of which we need to use. Here’s a picture of the eBay dongle opened up: It’s a PC board module (known as an HC-05) soldered onto another board that has a voltage regulator on it. If you look on the left-hand side you will see that two connections are bridged together with solder; Figure 2 The dongle opened up | Figure 3 HC05 BT module diagram Using the graphic for the HC-05 module and tracing the lines back, it is clear these are the Rx and Tx data input lines which both go to the 3.5mm plug, so this bridge needs to be removed so that we have TxD and RxD separate as supplied and needed by the G90. As the voltage is regulated down to 3.3v by the carrier board, a supply of 5-9v DC is fine to power the dongle. Of course, I had to remove the full-sized DIN plug from the lead and fit a suitable mini-DIN plug and wire to the available supply pin from the G90s accessory socket. Later for the combined BT CAT and BT audio solution, the audio in and out wires was also connected through to the mini-DIN plug. All good so far – now comes the tricky part. The G90’s serial port ONLY works at 19200 bps, so the module needs to be re-programmed from 9600 to 19200 bps before it will work. For this, you will need another small par-dollar interface board and some free software to do the speed programming change. Full details can be found on pages 4 & 5 of this document: https://www.yo3ggx.ro/btcat/FT8x7_DIY_Bluetootth_CAT_interface_v1.pdf Credit: Dan Toma YO3GGX. After updating the serial speed of the dongle, I was able to control several useful functions of the G90 radio from the PocketRxTx App running on my Android phone. The final combined design using modules for adding Bluetooth Audio and CAT connectivity to the XIEGU G90 and possibly other radios. In line with using modules, as the Handy Talkie, BT audio unit runs from an internal battery that has to be regularly charged up and the BT-Cat module needs to be powered, we need to supply their required DC voltages. While the BT-CAT module is happy with the 8/9v that the G90 can supply over its ACC socket – the Audio interface only expects 5v onto its micro-USB charging port. In theory, a very simple solution might be to insert a resistor from the G90’s 9v DC supply however as the load will change depending upon how charged or uncharged the internal battery is, it’s best to use a proper regulator. Looking around I found the small board below, that is used to power a Raspberry Pi with 5v to its USB connector, so this should suit our needs quite well. The charging cable supplied with the HT-BT audio unit has one USB-A connector and two micro-USB connectors so one will be connected permanently to the HT-BT unit and the other I will leave available and accessible to charge whichever Bluetooth headset is in use or the PTT button. This board or a similar one should be available from stores that supply parts for the Raspberry Pi and microcontroller kits. I got mine from Reichelt.de - https://www.reichelt.de/entwicklerboards-spannungsregler-6-40-v-dc-auf-2x-usb-5v-3a–debo-dc-2xusb-p242778.html Here is the connection overview. Picture of the box during construction.   Picture of the completed interface unit in “all its glory”! The cable with the mini-DIN plug from this box plugs into the ACC socket on the rear of the G90 and the stereo 3.5mm jack into the data socket on the side of the head unit. Note: do not plug the data connection in until the radio is operating as otherwise, the presence of a cable in this socket can cause the radio to think it is in the middle of a firmware upgrade and to set it back into normal operation can be difficult should this occur. When starting the use of the Bluetooth adapters, the HT module needs to be turned on by a long press on its button – this is inconvenient as it means the clear plastic box has to be opened. Once devices have been paired to the HT-BT unit once however they automatically pair again when they are turned on. (for the first time pairing procedure, refer to the HT BT-adapter documentation that it is supplied with (a magnifying glass may be needed). Improvements planned. The intention of building everything into the clear plastic box was always going to be a temporary solution. The use of the 2.5 & 3.5mm sockets on the HT-BT unit and its need to be turned on manually every time it is needed are two non-ideal situations. In a hope to resolve this into a better final solution, I have ordered an inline cable connector that has the stereo sockets in the correct spacing for the HT-BT unit and I have decided not to trickle change the BT-HT unit but rather have it accessible in an elongated cable harness with plus one end into the ACC socket and the other into the G90s data-port so that adding Bluetooth to the G-90 will then be the addition of just one cable with a small box in its middle housing the audio pre-amp and the BT serial board. The main thing is that the solution has been proven here – it is possible to add Bluetooth support externally to a Xiegu G90 using easily available modules and without any changes to the radio being needed. 73 Ed DD5LP.
What is HF radio?
  What is HF radio? Known as the decameter band or decameter wave, high frequency (HF) is the ITU designation[1] for the range of radio frequency electromagnetic waves (radio waves) between 3 and 30 megahertz (MHz). The HF band is a major part of the shortwave band of frequencies, so communication at these frequencies is often called shortwave radio. Because radio waves in this band can be reflected back to Earth by the ionosphere layer in the atmosphere – a method known as "skip" or "skywave" propagation – these frequencies are suitable for long-distance communication across intercontinental distances. The band is used by international shortwave broadcasting stations (2.310 - 25.820 MHz), aviation communication, government time stations, weather stations, amateur radio and citizens band services, among other uses. Different from VHF (Very High Frequency - 30MHz-300MHz) and UHF (Ultra High Frequency - 300MHz-3GHz) radios, HF radios cover far greater distances thanks to ionospheric refraction – but the HF radio signals are prone to distortion by atmospheric conditions such as geomagnetic storms or solar flares that radio users cannot control. HF communications are best suited for long distance communication between ground operators and base stations. Some HF radios normally cover HF band only, like the Xiegu G106, Xiegu G90, Xiegu X6100.   What about VHF/UHF radios? VHF radio waves operate in a band between 30-300 megahertz, while UHF radio signals are propagated within 300 megahertz and 3 gigahertz. These radio waves travel over line of sight, making them ideal for local communications over a few kilometres. Indeed, VHF radio waves normally travel within line of sight along the Earth’s surface. Common uses for VHF are FM radio broadcasting, television broadcasting, two way land mobile radio systems (emergency, business, private use and military), long range data communication up to several tens of kilometres with radio modems, amateur radio, and marine communications. Air traffic control communications and air navigation systems (e.g. VOR, DME & ILS) work at distances of 100 kilometres or more to aircraft at cruising altitude. VHF was used for analog television stations in the US, and continues to be used for digital television. UHF radio waves propagate mainly by line of sight; they are blocked by hills and large buildings although the transmission through building walls is strong enough for indoor reception. One of the biggest pros of UHF radios is that they do a much better job of penetrating barriers in urban locations, like concrete, steel, and wood. So this kind of radio is best suited for use indoors, including buildings with multiple floors, in industries such as manufacturing, distribution, education, retail, hospitality, and healthcare. They also work well for businesses that function in both indoor and outdoor settings, where there are a lot of surrounding buildings. Nowadays, some radios are capable of transmitting on both VHF & UHF bands, like Radioddity GS-5B, making it meet more outdoor and indoor activities requirements. There are also some dual-band radios featuring 10W high power like Radioddity GA-510, supporting a longer range of communication.   US Amateur Radio Bands Reference - SOUCE    
Xiegu G90 User Manual and Basic Operation (Updated: 2024)
The Xiegu G90 is a portable 20W HF SDR amateur radio transceiver with built-in auto antenna tuner. The display unit and the radio can be separated. It is a new member of the Xiegu product family and the first model of the new “G” series. The G90 is a 24-bit @ 48kHz sampling rate SDR. It has excellent TX/RX performance and a highly configurable user interface. • High-performance front end with narrowband pre-selection filters • Covers the frequency range of 0.5~30MHz, SSB/CW/AM/ FM* • 1.8 inch - high brightness color TFT LCD screen • ±24k bandwidth spectrum and waterfall display • Software-defined RX bandpass filters (CW mode down to 50Hz) • Detachable Front display unit • Up to 20W RF power output • Built-in wide-range automatic antenna tuner • Extensive Input/Output connections. • Baseband I/Q output. Interface with any external device that can handle baseband I/Q, including sound card-based or PC-based applications.   The following are some basic settings of Xiegu G90. To get a better understanding of the G90's capabilities and functions, please read the full Xiegu G90 User Manual made by Radioddity.   Band Selection The G90's frequency range covers 0.5 to 30 MHz. Amateur frequencies within this range are divided into 10 bands, and band switching can be performed in a number of different ways. Operation method: Press the BAND’s < or > button,Switch to the next or previous operating band separately. • Each amateur band has a user-defined frequency range associated with it. • The radio will be configured to allow 60 meter band operation if your country permits it. • VFO-A and VFO-B are two independent VFO’s that can be set independently.   Operating Mode SelectionPressing the [ MODE ] button increments through the available operating modes.   Note: The FM mode can only be turned on when used with the GSOC controller.   Volume Adjustment Speaker mode: Rotate the volume knob left or right to adjust the level of received volume. Headphone mode: Press the volume knob inwards momentarily to enter headphone mode and mute the speaker. Rotate the volume knob left or right to. VOX mode on / off: Press and hold the [FUNC] button for over 1 second. Press the volume knob briefly to enter the VOX function settings. VOX menu description: VOX OFF/ON: VOX function off/on VOX GAIN: Voice Control Gain Setting ANTI-VOX: Hand mic speaker noise-trip suppression setting VOX DLY: VOX hold delay setting The voice control function can be enabled for both the hand microphone and the line input LINE. This is handy for use when you only connect the RX and TX audio lines to the ACC. This will Key the G90’s TX key the radio automatically using digital modes. (no CAT required) When using the AF IN port of the ACC interface for line input audio, set the appropriate input volume level in the system menu. This will have an effect on the VOX level setting- so set it first.   Setting Operating Frequency There are three ways to set the G90 operating frequency. You can use the large main tuning knob, the multi-function knob and the microphone. 1. Set the tuning steps using the main knob • Short press the main knob, select 100Hz, 1kHz, 10kHz steps. • Rotate the main knob to set the frequency of the current step. 2. Rotate the Multi-function knob – 100khz increments 3. Set the frequency manually using the microphone: • Press the [F-INP ENT] button on the microphone. The G90 enters the frequency setting state. The cursor will blink in the first position on the left side of the frequency display. • Enter the frequency values you want to set, and then press the [F-INP ENT] button again to complete the frequency setting. For example, set the current frequency to 14.09000MHz, and the key order is as follows:   Setting Automatic Antenna Tuner This G90 has a high-efficiency automatic antenna tuner that can help you quickly set up your antenna. • A short press of the [TUNE] button will activate the built-in antenna tuner. The "TUNE" logo will be displayed at the top of the screen. (tuner in-line) • Press the [TUNE] button for 1 second and the tuner will attempt to tune the connected antenna. TheG90 will return to RX mode when tuning is complete. Note: 1. Press the [TUNE] button and the antenna icon appears at the top of the screen to indicate that the automatic antenna tuner function is turned on. The ATU is ready- but the automatic Antenna tuning has not been initiated yet. 2. If you start transmission and the SWR icon on the top of the screen is blinking, the ATU needs to be used because the SWR is High. 3. Long-press the ATU button to activate the auto-tune function. If it is successful (can tune the antenna you are using) the antenna icon on the top will not blink during transmissions. 4. When using a whip antenna and turning on the built-in antenna tuner for tuning, it is possible to cause strong RF interference to nearby electronic devices. Setting Function Button The G90’s common functions are distributed on the various function keys. Some function keys have a second function. When the function is selected, turn the main knob to adjust the value. Operation of the second function: • Press the [FUNC] button at first, the “F” indicator will light, then press the corresponding function button. • Press the [FUNC] button again to exit the second function. At this time, the “F” indicator is off. Note: In any function (including the second function of FUNC), press the main knob inwards to exit and return to the main interface. Button Function Table Button Func1 (press,cycle) Func 2(FUNC+) Hold press PRE/ATT PRE--ATT--Normal   / CMP/F-L Turn on transmit voice compression Digital filter F-L low-end frequency selection / NB/F-H Turn on Noise Blanker – on/off, Level, Width Digital filter F-H high-end frequency selection / AGC/SPL AGC off、AGC-S、AGC-F、AGC-Auto Turn on split frequency transceiver operation mode / VM. Switch VFO / Memory To be determined / MW/MC Turn on channel storage Turn on channel clear mode / A/B.A>B Switch between VFO-A and VFO-B Copy the current VFO to the background VFO / TUNE Turn on/off the auto antenna tuner / Start antenna tuner tuning POW POWER            Transmit power setting MIC GAIN          MIC gain setting / SWR THR   Standing wave protection threshold INPUT             Voice input selection / KEY SPEED         CW key speed setting CW  Volume       Side-tone volume setting / M/L/R   Manual/automatic left and right mode switching CW  TONE      Side-tone frequency setting CW Decode MODE      iambic A/B Mode switching / / QSK       CW Break-In On/Off / / QSK Time   CW QSK Hold Time Setting / / LOCK 5-level screen backlight brightness setting SCALE   Spectrum reference level setting Lock button,  
Xiegu XPA125B Preparation Before Using X6100 X5105 or G90
The Xiegu XPA125B is a 100W PA and ATU all-in-one device for the Xiegu series radios. It helps fast build an up to 100W high-power shortwave transceiver with the Xiegu radios like the G90, X6100, X5105, G1M, etc. For most radios of Xiegu, you may need a CE-19 adapter to connect, while an L4001 cable for the Xiegu X6100. You can also make it work with Yaesu FT-817 or FT-818 with a CN-20 adapter. Below we provide guidance on XPA125B preparation before using X6100, X5105 or G90. For Xiegu X6100 Please follow the XPA125B Preparation steps below before transmitting: The Autotuner requires a constant carrier to tune properly. An SSB transmission does not provide this. 1. Select the band you want to operate on 2. Verify the XPA125B Band is the same as the X6100 3. Switch the X6100 to AM and set the output power to maximum 4. Press the PA switch on the XPA125B (if necessary) to return RX to OFF 5. Toggle the X6100 tuner to OFF (If Necessary) 6. Key the Mic 7. Verify that the radio is not operating in the Split mode unless operating on the same band for transmit and receive. 8. Long Press the XPA125B ATU button to initiate an antenna match 9. Unkey the Mic when the matching session is completed 10. Set the X6100 output power to 5 watts (not greater than 8 watts when using SSB using a power supply) 11. Toggle the XPA125B PA to ON 12. Switch X6100 to SSB The XPA125B is now matching the antenna for the band and is ready to operate. --- --- --- --- --- --- For Xiegu G90 Please follow the XPA125B Preparation steps below before transmitting: The Autotuner requires a constant carrier to tune properly. An SSB transmission does not provide this. 1. Select the band you want to operate on 2. Verify the XPA125B Band is the same as the G90 3. Switch the G90 to AM and set the output power to maximum 4. Press the PA switch on the XPA125B (if necessary) to return RX to OFF 5. Toggle the G90 tuner to OFF (If Necessary) 6. Key the Mic 7. Verify that the radio is not operating in the Split mode unless operating on the same band for transmit and receive. 8. Long Press the XPA125B ATU button to initiate an antenna match 9. Unkey the Mic when the matching session is completed 10. Set the G90 output power to 5 watts (not greater than 8 watts when using SSB using a power supply) 11. Toggle the XPA125B PA to ON 12. Switch G90 to SSB The XPA125B is now matching the antenna for the band and is ready to operate. --- --- --- --- --- --- For Xiegu X5105 Please follow the XPA125B Preparationsteps below before transmitting: The Autotuner requires a constant carrier to tune properly. An SSB transmission does not provide this. 1. Select the band you want to operate on 2. Verify the XPA125B Band is the same as the X5105 3. Switch the X5105 to AM and set the output power to maximum 4. Press the PA switch on the XPA125B (if necessary) to return RX to OFF 5. Toggle the X5105 tuner to OFF (If Necessary) 6. Key the Mic 7. Verify that the radio is not operating in the Split mode unless operating on the same band for transmit and receive. 8. Long Press the XPA125B ATU button to initiate an antenna match 9. Unkey the Mic when the matching session is completed 10. Set the X5105 output power to 5 watts 11. Toggle the XPA125B PA to ON 12. Switch X5105 to SSB The XPA125B is now matching the antenna for the band and is ready to operate.

The G90 is the first model of the new Xiegu G-series. It's a portable 20W HF 10-160 mtr. multimode transceiver. The G90 uses 24-bit digital architecture. It also includes an internal automatic antenna tuner. The G90 has excellent transmit and receive performance. It packs huge performance into a small portable package.

The G90 has a removable display head that can be separated from the main body and connected via a DB-9 cable (provided with the radio). Both the radio's control head firmware and main body operating firmware can be user-updated using separate connectors on the head and body. The programming cable is provided.

FW Update Note
Please update the display unit first then the base. Also please note you must choose the 1k option in the file transfer menu. In the beginning, you have to press the space bar very quickly or it won't go into program mode.

Detachable Display Unit

The detachable display design allows you to customize your installation.

Color LCD Display Shows

±24khz bandwidth spectrum and waterfall. The sweep/refresh rate is very fast. The status of all functions are shown on the LCD display.

Convenient Side Interface

The G90 uses a standard 3.5mm stereo jack (3-pin) for connecting headphones. Also on the control head is a Firmware update port.

Multi-Function Mic

The microphone has two configurable and several dedicated function buttons.


Features

  • Up to 20W of RF power
  • High-performance RF front end giving superb selectivity
  • Modes provided are USB/LSB/CW/CWR/AM/NFM
  • 1.8-inch high brightness color TFT LCD screen
  • ±24k bandwidth fast-scan spectrum display with waterfall
  • Adjustable DSP band filters (CW mode can be as narrow as 50Hz)
  • Detachable front panel/display head unit
  • Built-in CW Decoder
  • Built-in Antenna SWR scanner
  • Built-in wide-range automatic antenna tuner
  • Built-in mediumwave (AM broadcast) high-pass filter
  • I/Q output for interfacing with a PC or adapter
     

NOTE

  • FM mode is available.
  • It's normal that G90 overheats if used for a long time.
  • If you want to keep the power of G90 on 20W, the voltage must be in 13.8 V-15V.
    If the voltage is 13.8V below, the power would not be guaranteed and the driving kinetic energy would not enough.


# General Specifications
Frequency receive 0.5MHz-30MHz
Frequency transmit: 1.8-2.0MHz | 3.5-4.0MHz*
5.330.5-5.405MHz | 7.0-7.3MHz*
10.1-10.15MHz | 14.0-14.35MHz
18.068-18.168MHz | 21.0-21.450MHz
24.89-24.99MHz | 28.0-29.7MHz
Operating modes: USB/LSB/CW/CWR/AM/FM (*2)
Minimum step: 10Hz
Antenna impedance: 50Ω
Working temperature: 0°C ~ +50°C
Frequency stability: ±1.5ppm in the 10~60min after startup
@25°C: 1ppm/hour
Power supply voltage: 10.5~16.5VDC, negative ground
(must be 13.8-15V if need 20W)
Current consumption: Receive: 700mA@ Max
Transmit: 6A@ Max
Antenna socket: SL16-K type, impedance 50Ω
Case size (mm): 4.75 x 1.75 x 8.25inch | 12 x4.5 x21cm (case only)
5.5 x 2 x 9.8inch | 14 x 5.2 x 25cm (with handles)
Weight: About 3.6lb | 1.63kg (main body)
# Transmitter
RF output power:
(@ 13.8VDC)
20W(SSB/CW/FM/AM)
Spurious suppression: ≥50dB
Carrier suppression: ≥40dB
Microphone impedance: 200Ω ~10kΩ (600Ω in general)
# Receiver
Circuit type: Zero-IF (ZIF) direct conversion SDR
Neighboring channel suppression: ≥60dB
Sideband suppression: ≥60dB
Mirroring suppression: 70dB
Sideband suppression: 60dB
Audio output: 0.5W (8Ω, ≤10% THD)
Audio output impedance: 4~16Ω

*Note:
1. The 80-meter or 3.5 MHz band is a band of radio frequencies allocated for amateur radio use, from 3.5 to 4.0 MHz in IARU Region 2 (consisting mostly of North and South America), and generally 3.5 to 3.8 or 3.9 MHz in Regions 1 and 3 (the rest of the world) respectively.
2. The 40-meter or 7-MHz band is an amateur radio frequency band, spanning 7.000-7.300 MHz in ITU Region 2, and 7.000-7.200 MHz in Regions 1 & 3.


Sensitvity SSB/CW/FM AM
0.5~1.79999MHz / 10uV
1.8~1.9999MHz 0.35uV 10uV
2.0~27.9999MHz 0.25uV 2uV
28~30MHz 0.25uV 2uV


(PRE=on,ATT=off,NB=off,NR=off,SSB/CW/AM = 10dB S/N,FM = 12dB SINAD)


Recommended Accessories (not included in the package)
1. Xiegu CE-19 Expansion Port for easy PC connection
2. Xiegu DE-19 Data Interface Expansion Adapter
3. Radioddity G90-H1 Holder & Cooling Fan
4. Radioddity G90-H2 Stand
5. Radioddity G90-H3 Portable Stand
6. Radioddity PB3 Carrying Case
7. Xiegu XPA125B 100W Power Amplifier
8. Xiegu GSOC Controller Panadapter/Data Terminal
9. Xiegu GNR1 Digital Audio Noise Filter
10. Xiegu VG4
40m/20m/15m/10m 4-band Vertical Antenna
11. Xiegu DH100 100W Portable Power Station
12. Xiegu G90 Spare Parts Kit
13. Radioddity HF-008 Portable 6M-80M Antenna
 

Package Content
1 x Xiegu G90 Transceiver
1 x Multi-function Microphone
1 x Firmware Cable
1 x Power Cable
1 x DB-9 Remote head cable
1 x Operation Manual
1 x Warranty Card
1 x Certificate
2 x Fixed Stud
1 x Hexagon Screwdriver
4 x Front and rear extension handles
 

Xiegu G90 Detailed Review


1 Year and 6 months
Manufacturer's Warranty.
• This warranty from Radioddity covers all new items (except Xiegu brand) purchased from radioddity.com. For purchases made through other platforms like Amazon, eBay, and Walmart, we offer a 1-year warranty period from the date of purchase. The specific warranty terms may vary depending on the authorized dealer.
• This warranty cannot be transferred. You need to provide proof of purchase from us or an authorized dealer to avail warranty service.
• For Xiegu brand items, we offer a 1.5-year warranty for the G90, X6100, and X5105 models starting from September 14, 2022. All other models come with a 1-year warranty.


What Does This Limited Warranty Cover?

We warrant that the Products are free from defects in materials and workmanship under normal use and use in accordance with the respective Product user manual, during the Warranty Period. Please refer to the Instructions inside each package for a description of proper use and care of the unit.


What Does This Limited Warranty Not Cover?

This limited warranty does not cover damages directly or indirectly arising or resulting from or during:

(1) accident, misuse, abuse, vandalism or acts of God (including lightning and other weather conditions)

(2) use with another product or other damage or loss suffered by the use or combination of any other item

(3) improper or inadequate maintenance

(4) repairs by an unauthorized service technician

(5) normal wear and tear
 

Open Box

Open Box items are products that have damaged packaging or are otherwise not suitable to be sold as new. All items are tested to be working by a member of our team.

Open Box items come with a 6-month warranty instead of the standard 18 months warranty and are not eligible for any warranty extension offered to new products. We will not accept returns of Open Box items due to cosmetic damage or other non-performance-related issues. All sales of Open Box items are final and not eligible for a return or refund.

If for some reason the item is defective on arrival, please contact
support@radioddity.com so we can arrange a replacement.


If you are satisfied with our products and service, please kindly leave us a positive product review. Any problem, be free to contact us support@radioddity.com
We strive to answer all emails as quickly as possible, but due to high email volume, it may take time for us to reply. Thanks in advance for your patience!

Order Processing

All orders are processed within 1-2 business days after we receive your full payment, excluding weekends and holidays.

As soon as your order is ready, we’ll update the tracking number and send it to you if you’re a Radioddity Member. We highly recommend that you register as a Radioddity Member here. If the item you ordered is temporarily out of stock, our customer service team will reach out to you. You can choose to wait until the item is back in stock or cancel your order.

Please be aware that we have several distribution centers globally. Therefore, your orders may be shipped from various locations including the United States, Canada, Europe, or China, depending on the availability of the product in our inventory.
 

Flat Shipping Rates
 

Country

US

EU

Outside US & EU

  Free when order amount ≥ $99.99 Free when order amount ≥ $99.99 Free when order amount ≥ $99.99

Flat fee

$9.99

$9.99

$9.99

Ship from

➤ United States
➤ China

➤ Germany
➤ China

➤ China

Handling time 1-2 business days 1-2 business days 1-2 business days

Delivery time

5-7 business days

5-7 business days

7-15 business days

Note:

1. Customs fee included for US & EU countries.

2. Please note that taxes will be applied to shipping rates. These taxes will be calculated and added to your total at checkout.

3. US Shipping does not include Alaska, Hawaii and Puerto Rico area. Please contact us for a detailed shipping fee to these areas.

4. For EU countries, please be aware that the listed product prices do not include VAT.

5. For shipping options to other countries, please visit our EXPANDED INTERNATIONAL SHIPPING page.

6. Please be aware that for outlet items, pre-orders, and open box items, the shipping services and charges may vary.
 

How Do I Change The Shipping Address Or Cancel My Order


Contact support@radioddity.com (CLICK HERE) immediately if you need to change the shipping address or cancel your order. Please be advised that some orders are shipped very soon after placement and it will not always be possible to make changes to the shipping address and/or cancel the order.


Frequently Asked Questions


1. What forms of payment do you accept?
Radioddity.com currently accepts PayPal* or credit card for all orders.
*When purchasing with PayPal, your shipping address will automatically default to the address on file with PayPal, regardless of the shipping address you enter on your Radioddity.com order.

2. Why has my credit card payment failed?
Payment with a credit card may fail because of bank authorization and fraud prevention systems. If you are having trouble making a payment via Credit Card, you may contact your card issuing bank or PayPal directly. Here are PayPal's phone numbers:
+1-888-221-1161 (US & Canada Toll Free) +1-888-215-5506 (US & Canada Toll Free)
+1-402-935-7733 (International) +1-402-935-2050 (International)

3. How do I know if it is safe to shop with you?
Radioddity.com takes great pride in offering a safe and secure online shopping experience. We also respect your privacy and we're committed to protecting it.

4. Is there any discount for bulk/volume purchases?
Radioddity does provide discounts for some bulk/volume purchases. Please email our customer service for more details.

5. Do you ship internationally?
Yes, we do! We ship to US & EU countries. For some products, we ship to CA.

6. How can I contact Radioddity.com for additional assistance?
Email Customer service:
please email us via support@radioddity.com, and we will respond to your email as quickly as possible, usually within 24-48 hours.

7. How are warranties handled?
Repairs on defective merchandise are handled by the manufacturers and not by Radioddity unless otherwise indicated. If any item arrives damaged due to shipping, immediately contact the courier. Keep all shipping materials and contact us immediately.

8. Why didn't I receive an order confirmation email after my PayPal payment is completed?
We send a confirmation email to your primary PayPal email address or the e-mail address you have specified if you used the "PayPal Express Checkout" method. Make sure that you have a Radioddity account registered under your PayPal account's primary e-mail address.
In rare circumstances, a technical bug confirmed by PayPal can get in the way. If you do not receive any information at all, and your order does not appear in your Radioddity account, please contact us and send us your order details.

9. How do I change the shipping address or cancel my order?
Please contact customer service immediately if you need to change the shipping address or cancel your order. Please be advised that some orders are shipped very soon after payment and it will not always be possible to make changes to the shipping address and/or cancel the order.

10. What does Radioddity.com charge for shipping order and how long will it be before I receive my order?
Please CLICK HERE to learn about our shipping policy.

11. Do you ship to PO boxes or Military APO/FPO addresses?
Only USPS can ship to both PO Boxes and Military APO/FPO addresses. The items have to be less than 2kg. Please allow additional time for orders to be shipped to these addresses. Express shipping cannot be sent to both PO Boxes and Military APO/FPO addresses.

12. Why am I unable to track my order?
It can sometimes take 24-48 hours or so for tracking information to update once an order has shipped from our warehouse.
Occasionally, a package may not receive the proper origin and transit scans while on its journey to you, so neither us nor express is able to track the exact location of the package in transit.
Please email us if you do not receive your order by the end of the quoted time frame. Please note that orders shipping via UPS can be delivered as late as 9:00 pm local time in some areas.

13. Taxes, Customs, & Duties
If the package is checked by your country's customs office when the item arrives in your country, most websites are declaring that you are responsible for import duties, tariffs, and taxes. However, Radioddity will be happy to go fifty-fifty with customers. Quality customer service is our highest value and we try our best to reduce our customer’s loss.

14. How do I return products if I am unsatisfied?
Please CLICK HERE to learn about our return policy.

15. What do I do if received the wrong item?
Return the wrong item. If the item you received is completely different from the one you ordered, please contact our Customer Service with photos or videos of the different product. If a return is necessary, replacement plus return shipping cost will be issued to you on receiving the returned product. Or if you decide to keep it, we will offer a 10% discount for buying it.

16. How do I return defective items?
If your product turns out to be a defective one with physical damage within 30 days from the initial receiving date. You can mail the item back in the original package without any wear and tear for a free replacement. However, you will need to provide photos and videos showing the defect(s) of the product.
*NOTE: We strongly recommend obtaining and saving your return tracking number until you are notified that we have completed your refund.*

17. When will a replacement be sent?
Replacements are treated the same way as that of new orders -- they typically arrive in 10 to 13 days. If a product needs to be returned for replacement, the replacement is sent after receiving the returned item.

18. How long does it take for me to get a refund?
It may take 1 or 2 weeks for your return to reach our warehouse. Once it is received and inspected (usually within 72 hours of arrival) your refund will be processed and automatically applied to your credit card or original method of payment within 2 days. Please note that depending on your credit card company, it may take additional 2-10 business days after your credit is applied for it to post to your account.

USD