
DIY SOLA WOOD FLOWER BRIDAL BOUQUET
Making your own wedding bouquet will help save you money, but most importantly, you’ll have the satisfaction of creating something beautiful and personal for your big day.
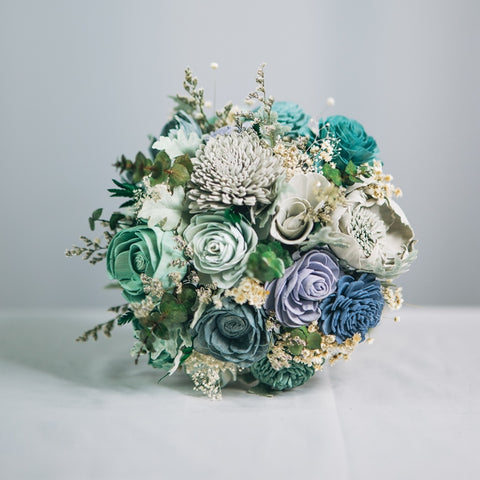
Floral Supplies and Tools Needed
- Sola Wood Flowers
- Preserved Eucalyptus
- Dried Star Flowers
- Dusty Miller
- Leather Fern
- Bouquet Grass
- Cutting Shear
- Glue Gun
- Floral Tape
- Floral Wire
- Burlap Twine
[[supplies]]
STEP 1: Dye the Sola Wood Flowers


Pour water into a bowl. Add the sola softener and stir thoroughly.

Add the sola dye and mix well. Your dye bath is now ready.

Dip-dye the flowers. Let them dry for at least 24 hours.
Check this How To Dye Sola Wood Flowers tutorial. You will learn the basic steps of using sola dye to color the flowers.
STEP 2: Stem the Sola Wood Flowers
Grab a floral wire and apply hot glue to the tip. Carefully push into the base of the flower and hold for a second. Let the glue dry and make sure the flower is firmly attached to the stem.

Stem all the needed flowers before starting to make the arrangement.

Learn how to stem sola wood flowers like a pro in this Tutorial.
STEP 3: Start Arranging the Bouquet
Pick three or four blooms to form the base of your bouquet and add stems to this focal point.


STEP 4: Add Greenery and Fillers


STEP 5: Finish the Handle with Bouquet Grass


STEP 6: Wrap the Handle with Burlap Twine


STEP 7: Cut the Excess Stems


[[supplies]]


